Introduction
What is UV mapping
UV mapping is a crucial aspect of 3D modeling and texturing that allows artists to apply textures to their models accurately.
In simple terms, UV mapping is the process of creating a 2D representation of a 3D model’s surface so that textures can be applied.
For example: water bottle labels are created as a rectangular shape and they are wrapped around the bottle to take the cylindrical shape.
Same idea for 3D models, the bottle being the model and the labels being the textures however it’s the other way around you cut the model (convert it into flat 2D surface) to apply it on the texture,
other example of it: Earth maps although earth is a 3D round object it’s represented as a flat rectangular shape map.
What does UV refer to?
U and V are the axis of the 2D Grid since the x,y and z are used for the 3D axis
UV mapping process is done with 3D modeling softwares, it can be done manually by artists which takes time but for better quality and controlled results, alternatively there are automated UV mapping tools that gives much faster results but -for now and for the tools I know- it gives low quality results
UV mapping manual process
The main goals for the artist in this process are unwrapping the model with:
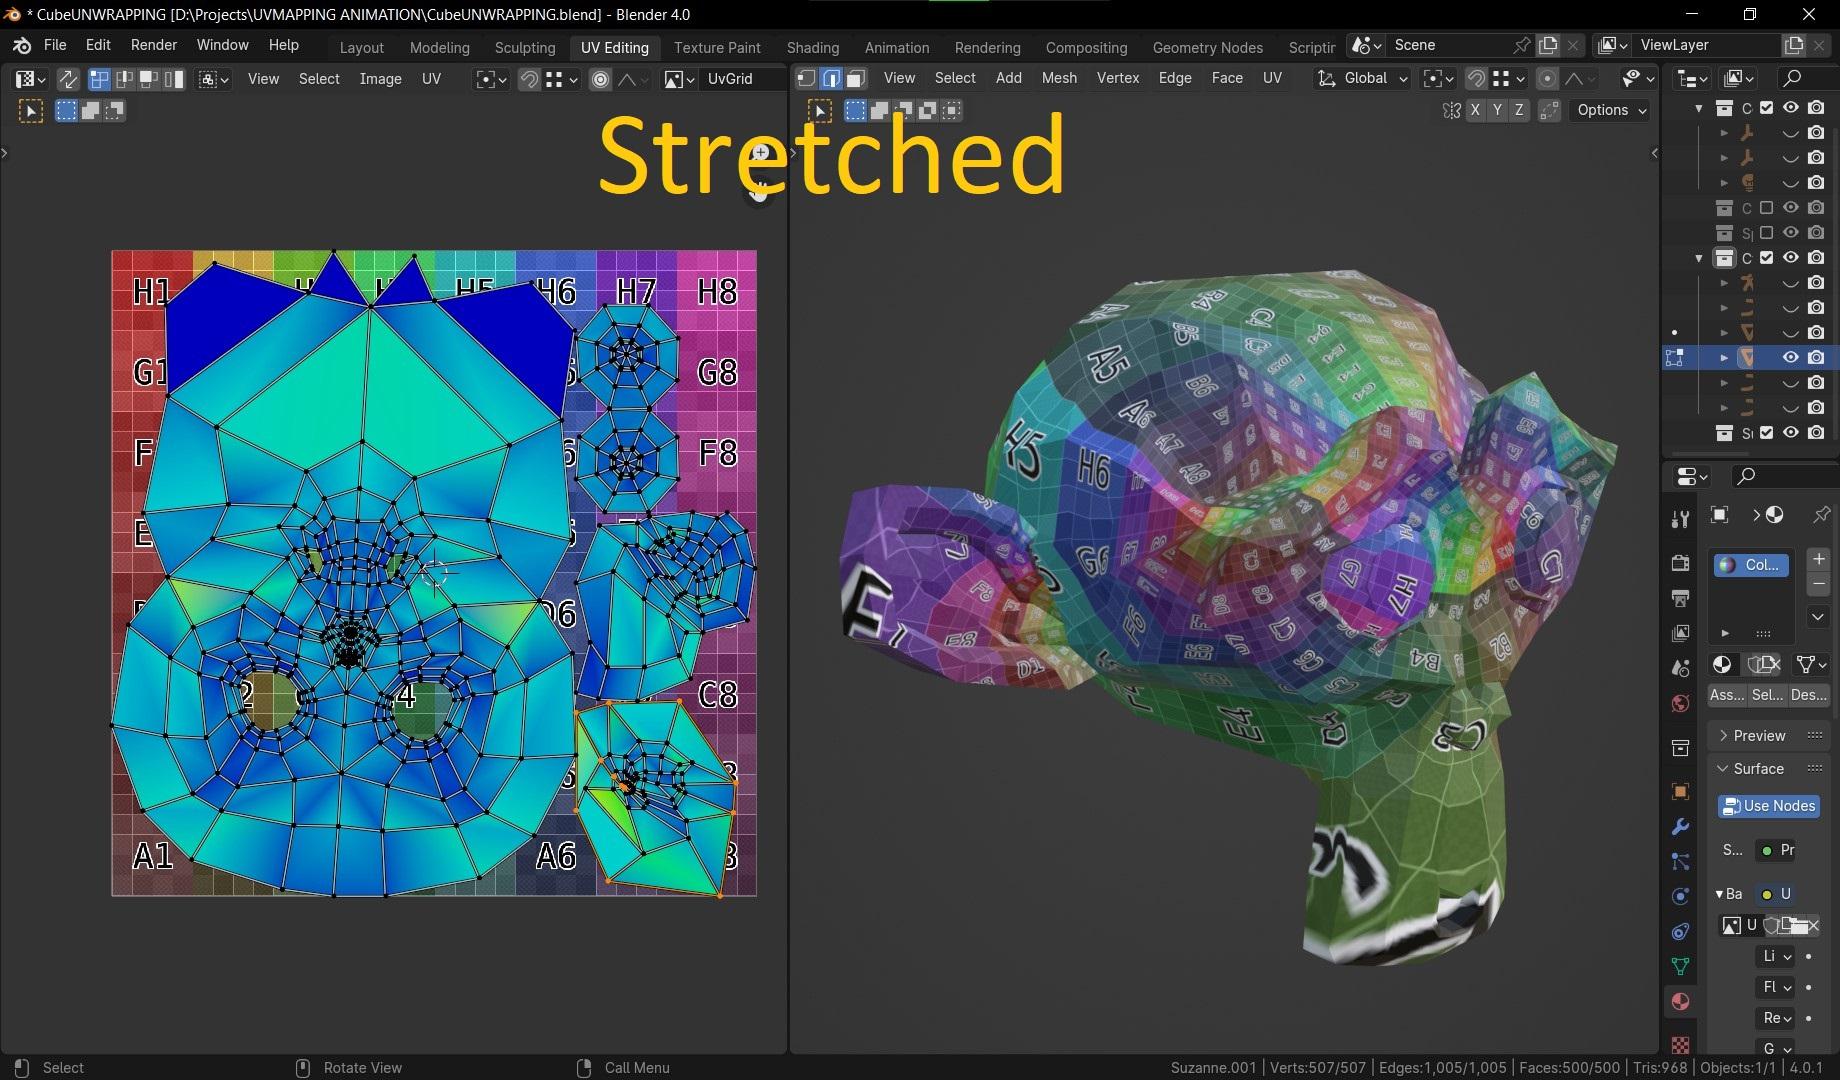
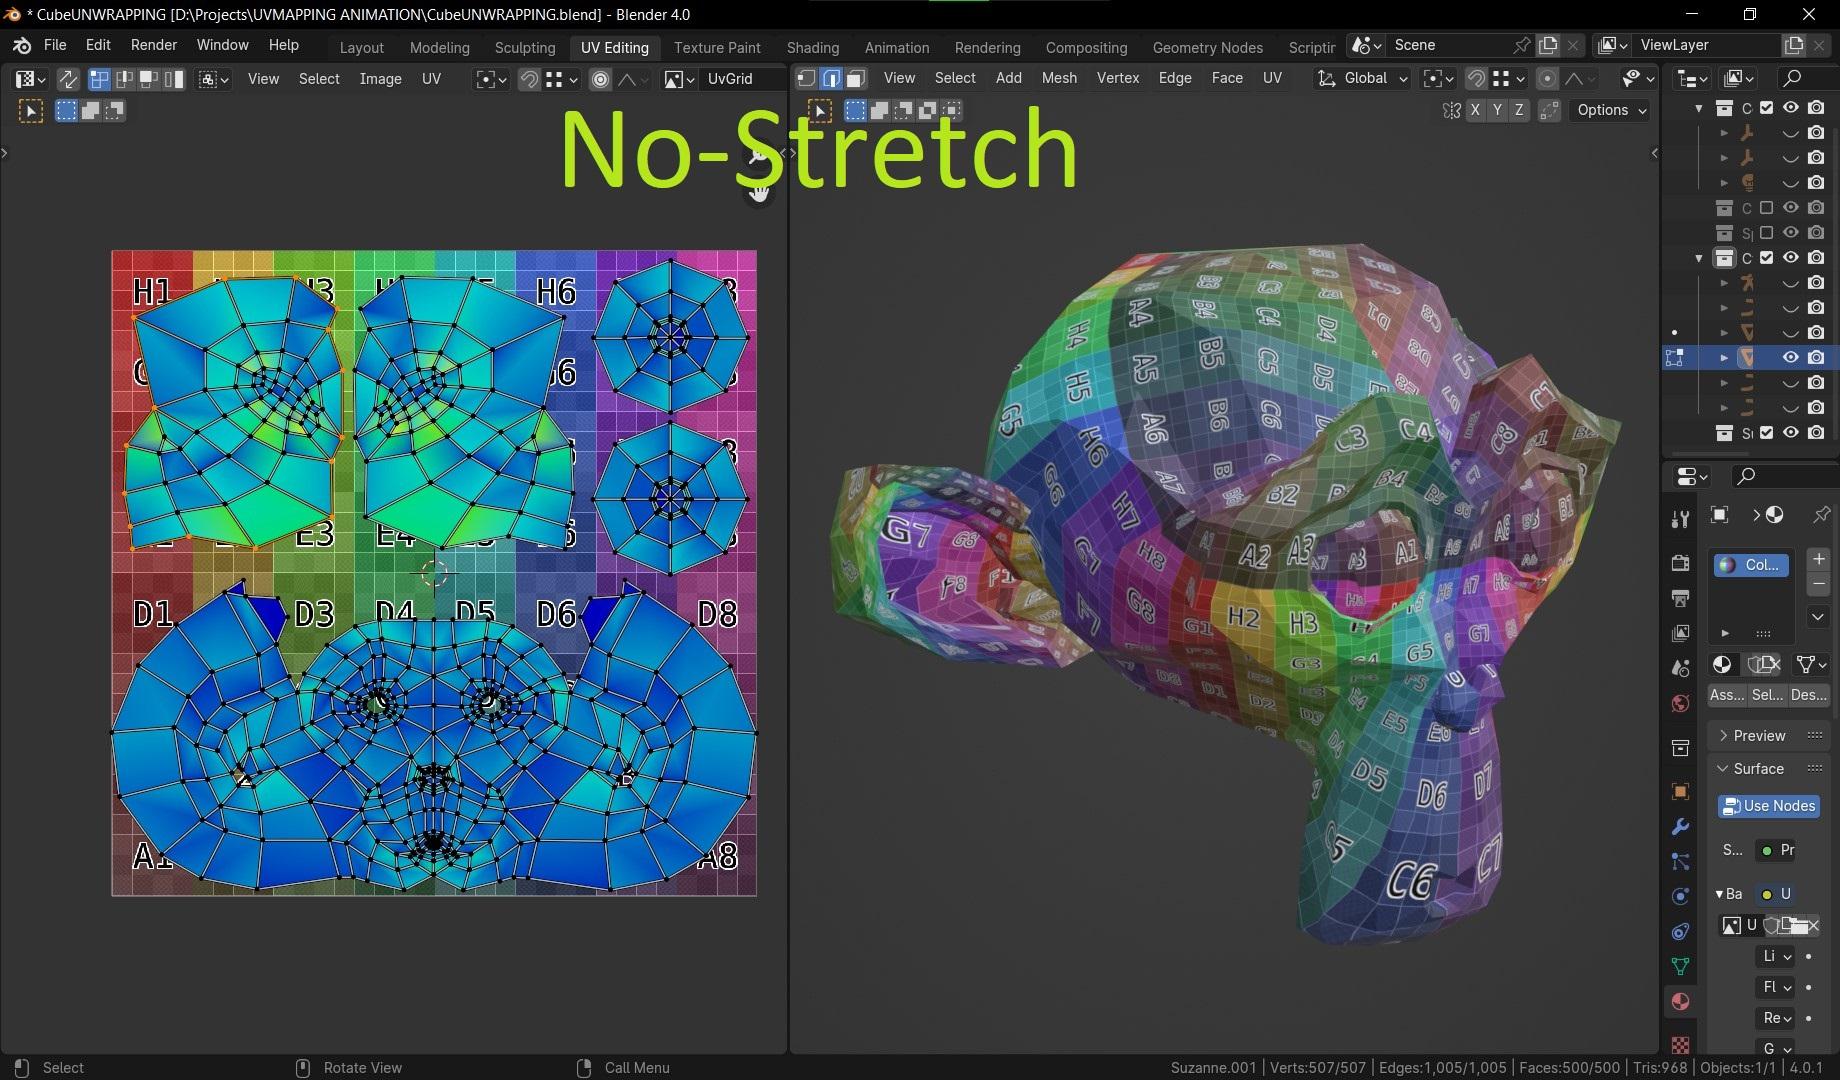
- no stretches
if there is much stretching; the texture would appear distorted. - the least amount of seams
seams can lead to visible artifacts and stretching in the texture - covering the largest area possible of the UV ٍspace.
since we are bounded with an image that has resolution weather it’s 1, 2 ,4k or even higher we want to take advantage of every space of the UV as much as possible to reach the highest resolution applied on the model from the image.
UV mapping can be divided into two major phases:
- UV unwrapping
- UV packing
UV unwrapping
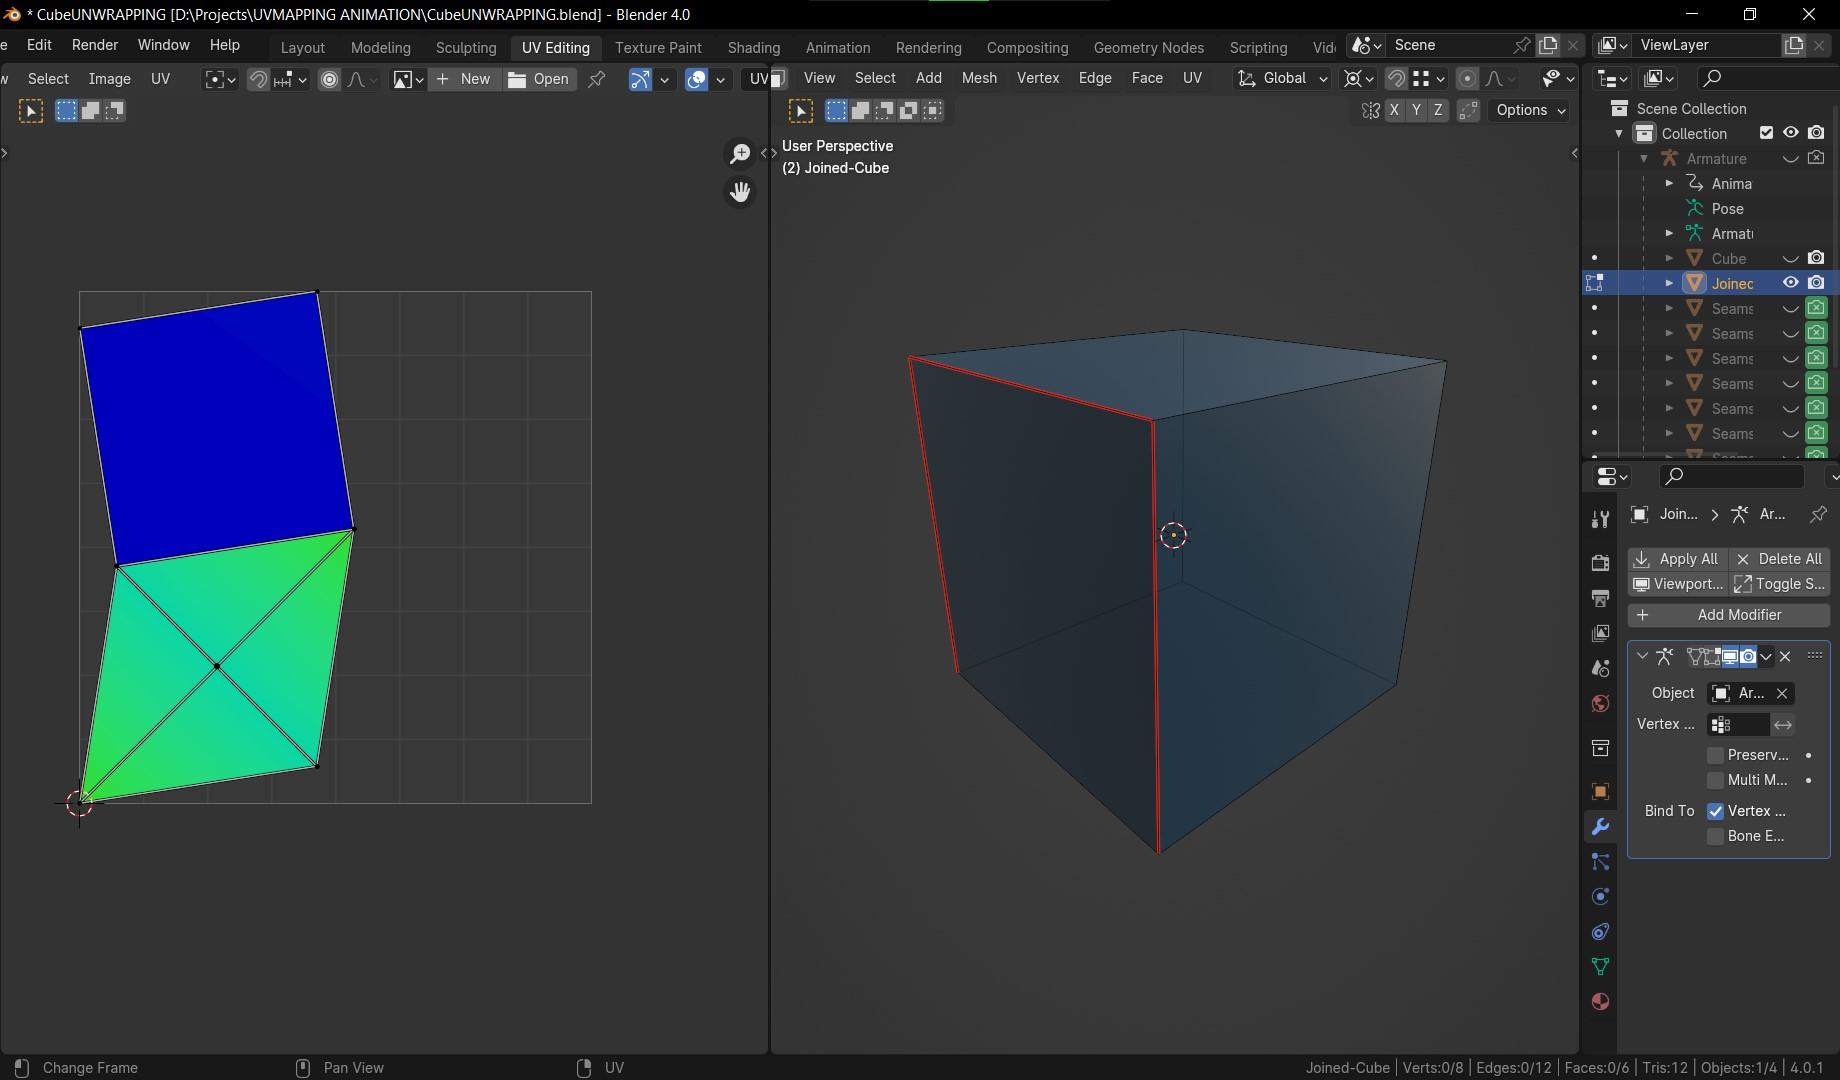
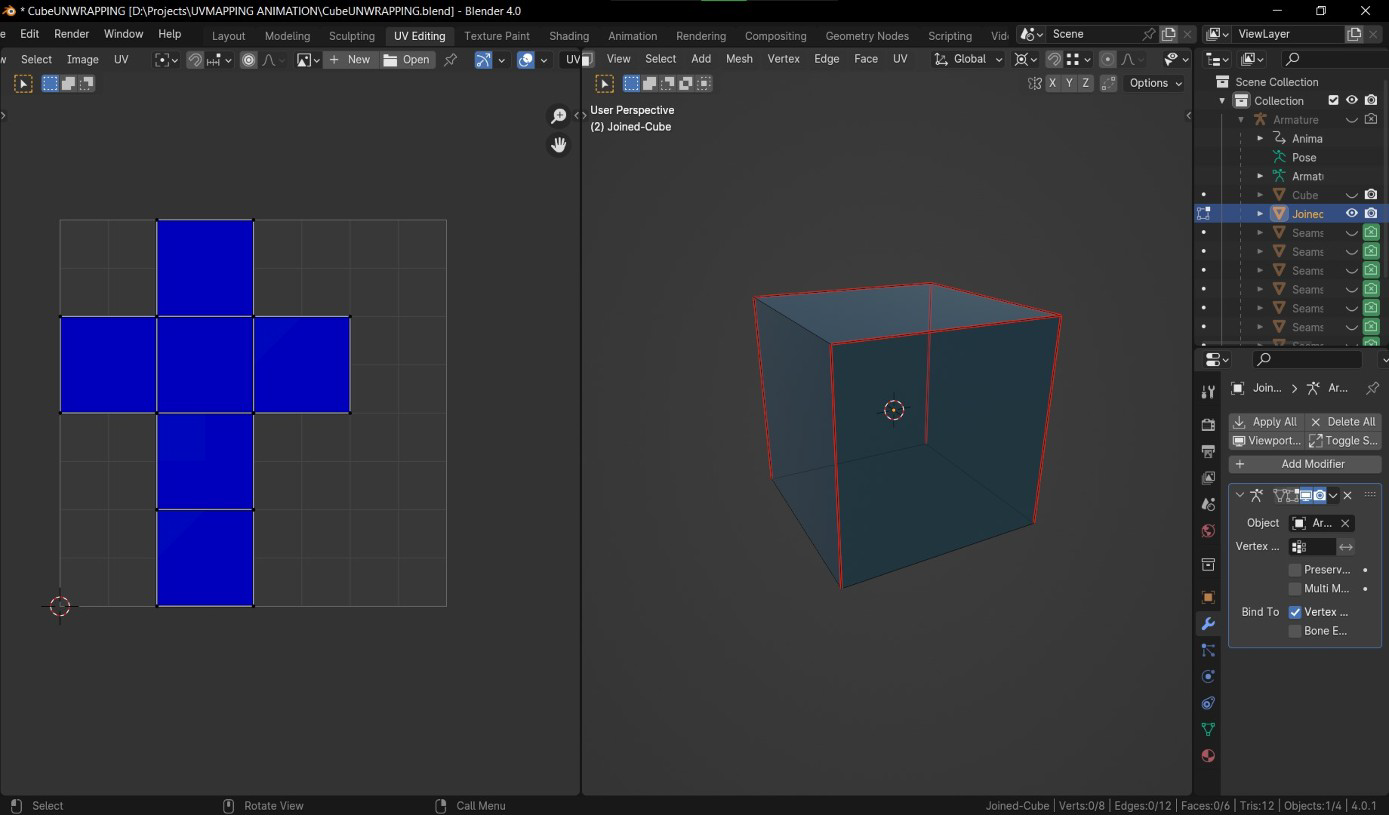
Firstly, we need a 3D modeling software that provides this service so we are going to use blender.
We start with unwrapping the model, so click on the “UV editing” layout on the top bar,
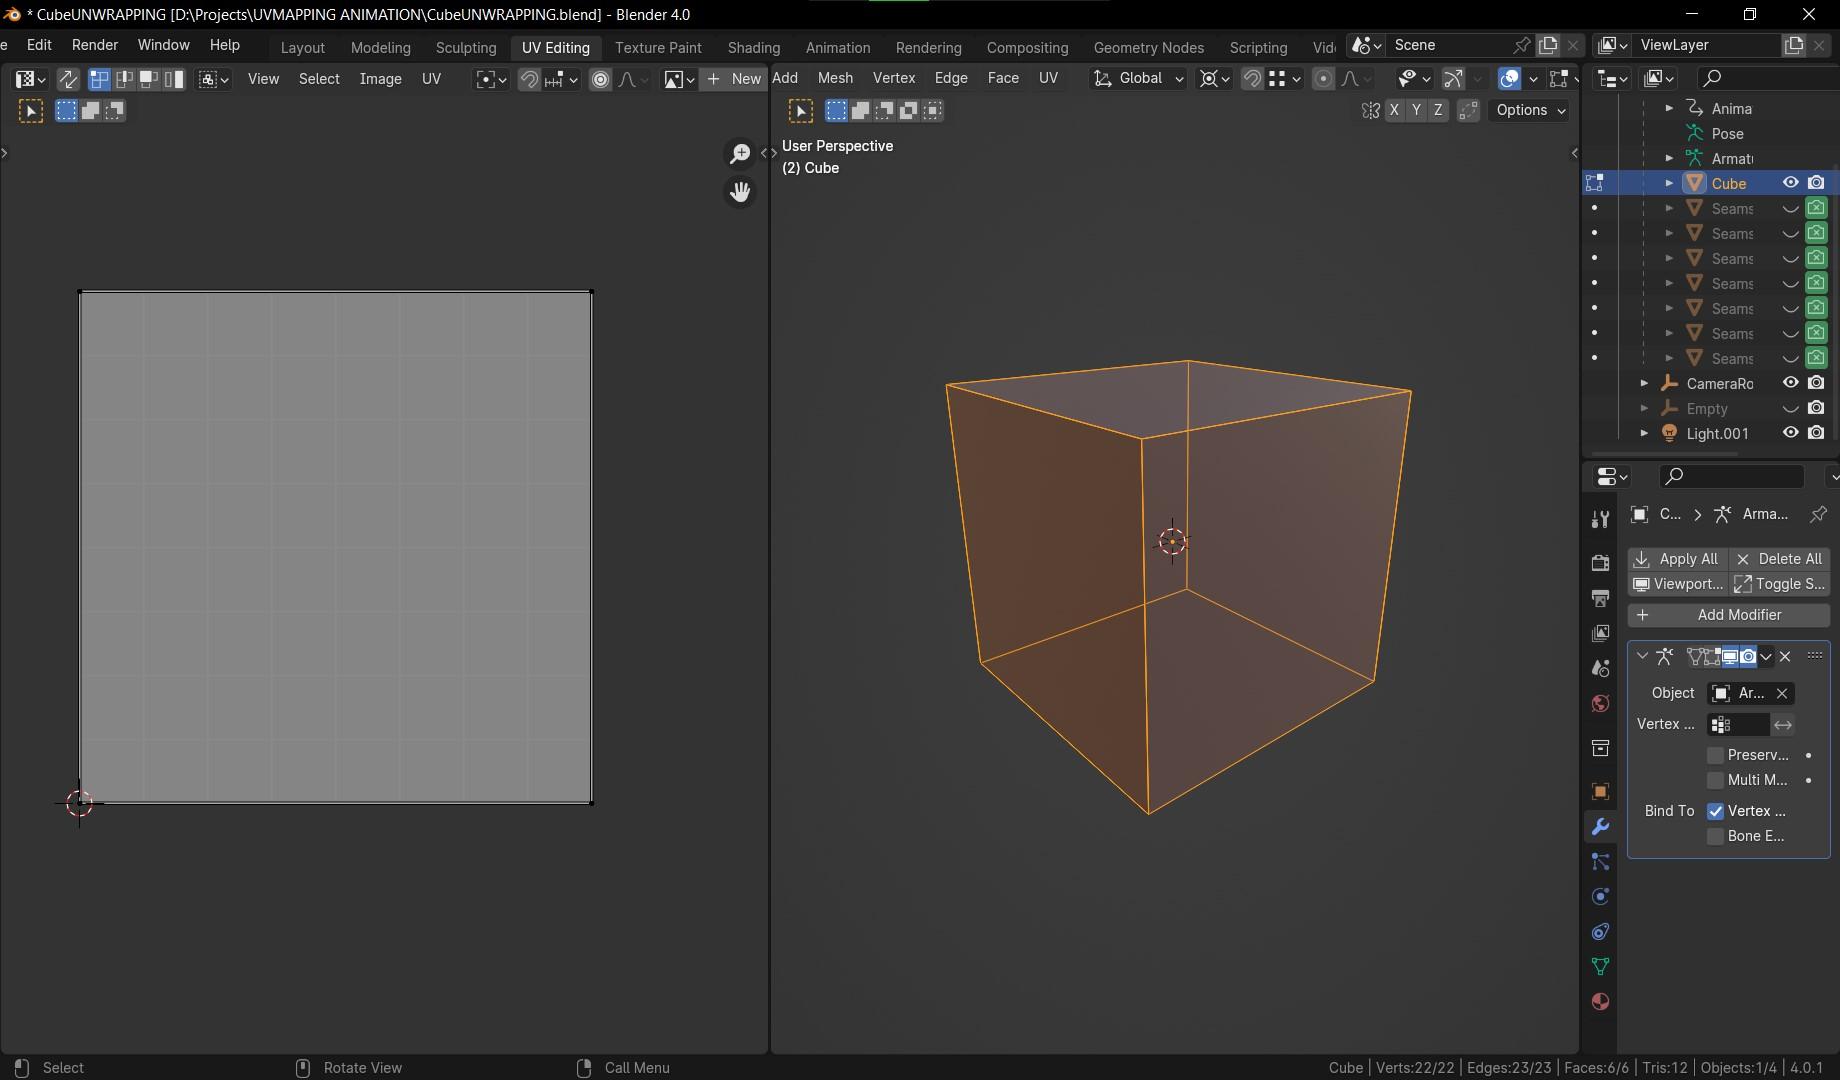
to cut the edges we create seams on them:
select the edge and go to the edge menu (Ctrl+e) and press mark seam, this will cut the edge in the UV space,
to simplify things it would be easier if you imagine carrying a cutter or a scissor and start cutting it so it’s eventually a flat paper.
Let’s learn how to unwrap the basic models:
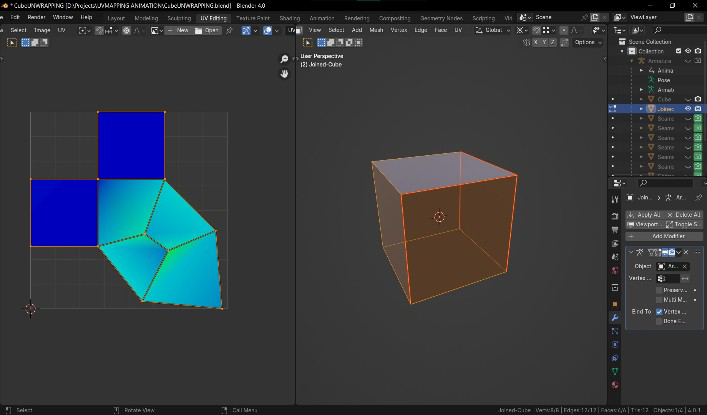
let’s start with the cube:
- Start with creating seams [cutting ] 3 edges of a face, so it’s disconnected from the top and side faces but still connected with with bottom face,
- Let’s go to the neighboring face, now it’s disconnected from one side but still connected to the top and the other side; so we mark seam the top edge and the side
- We will do the same for the next face as the last one
- The forth side face will be connected with the top face but they are both disconnected from the other 3 side faces and connected with the bottom face, so the lid will open and lay flat on it’s own
- Press U to open the unwrapping menu then select unwrap
Now, let’s take the cylinder:
Shift + A >> meshes >> cylinder
- Simply mark seam the top face
- Mark seam the bottom face
- Now, make a seam on one of the vertical edges
- Press U then unwrap
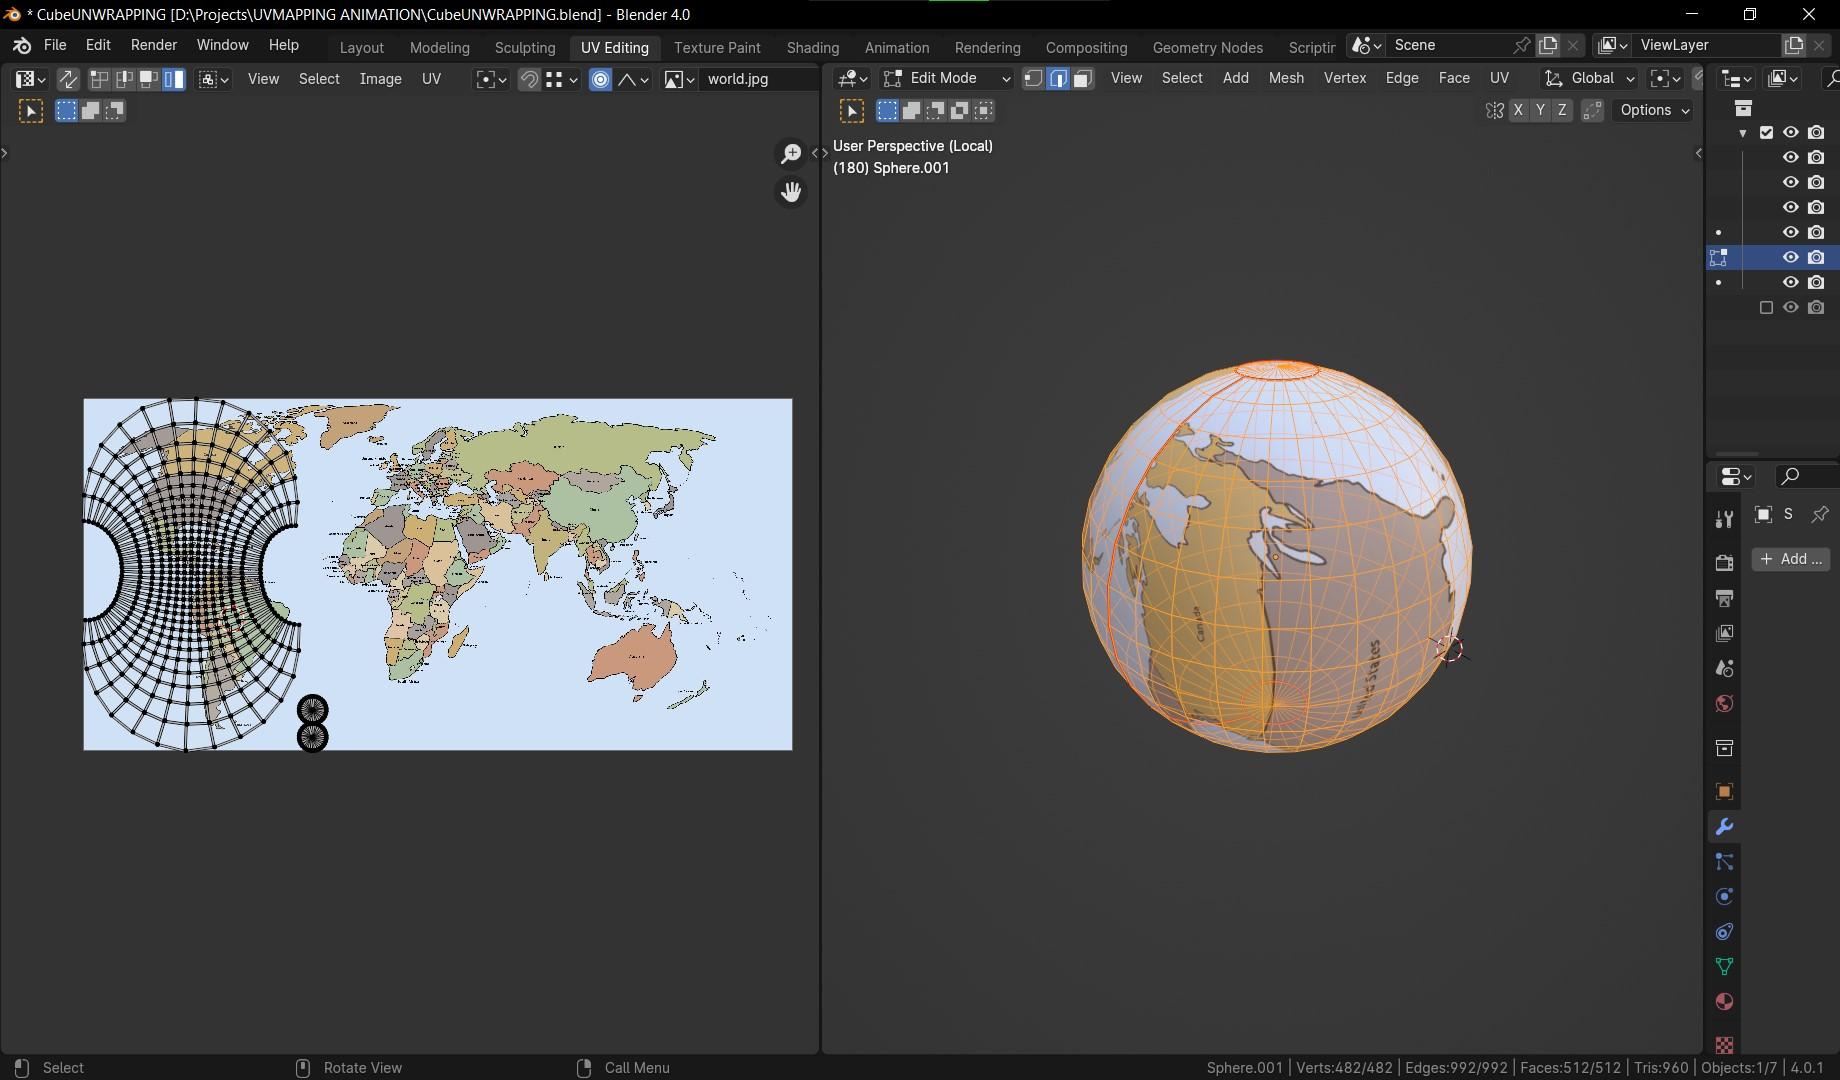
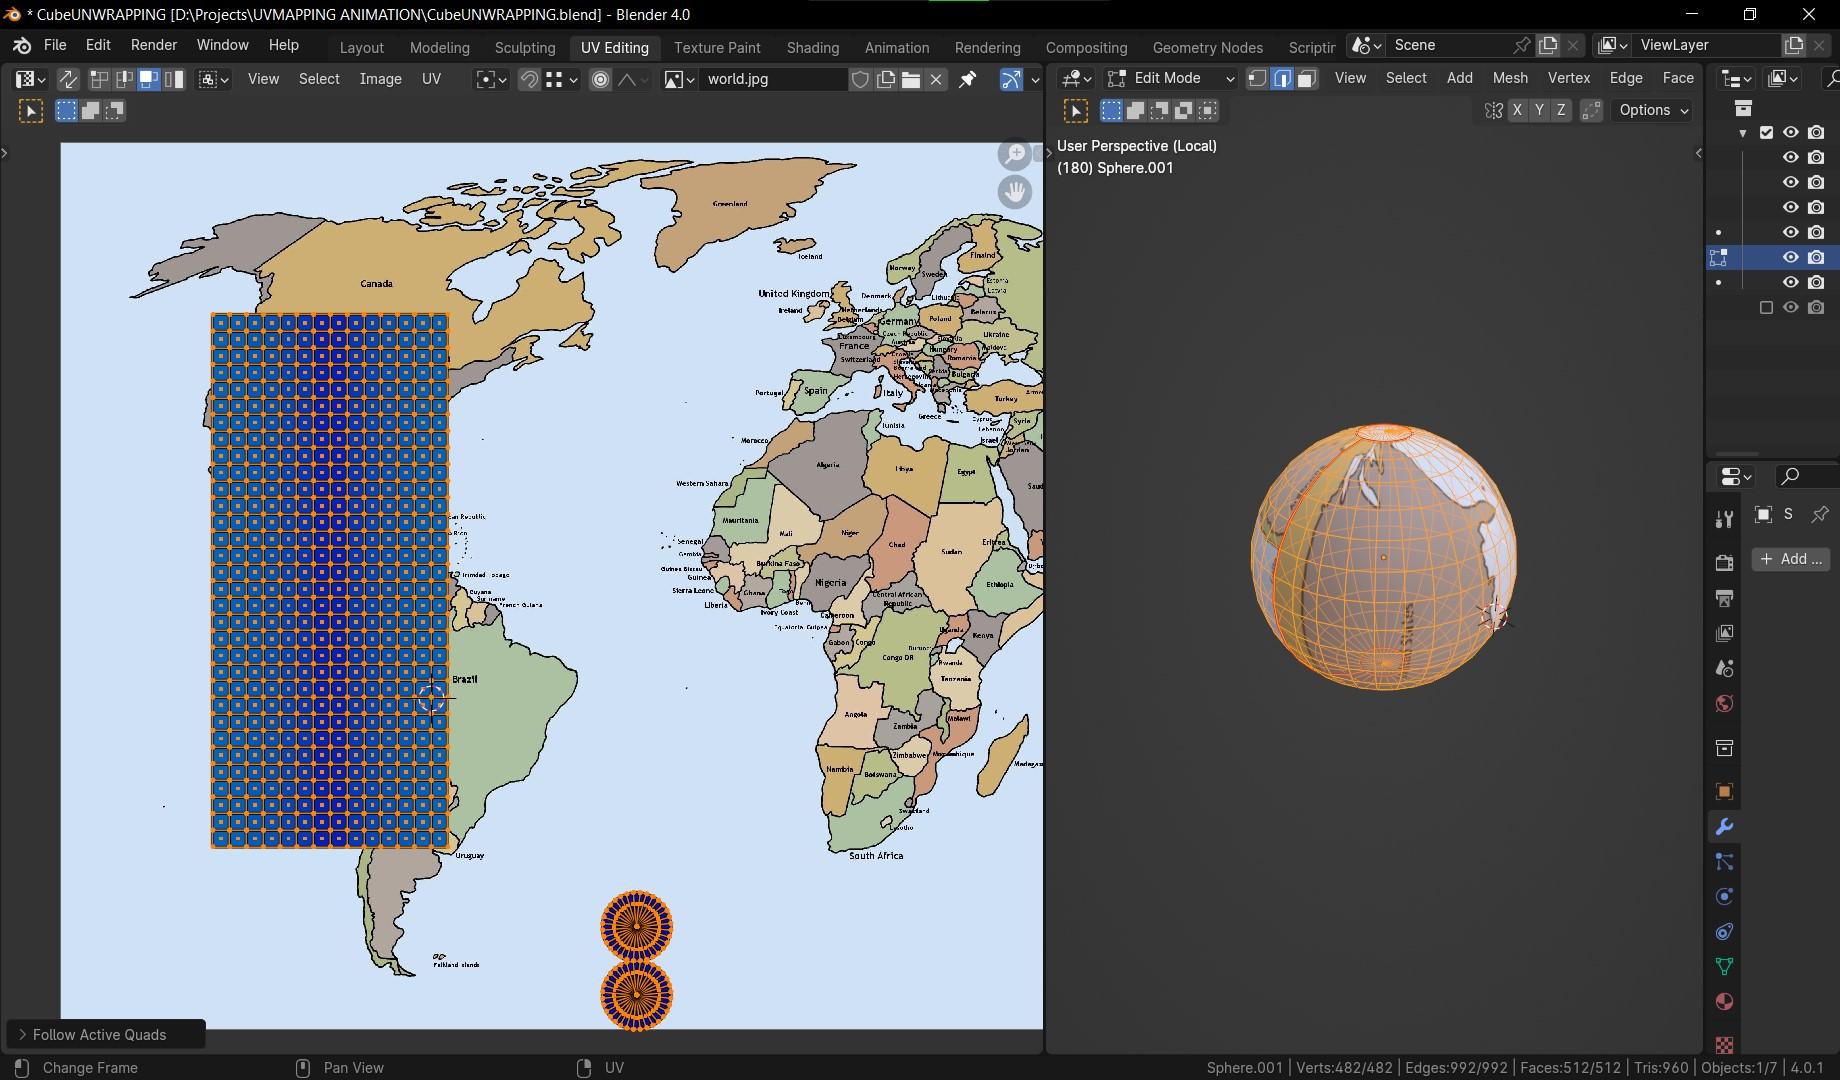
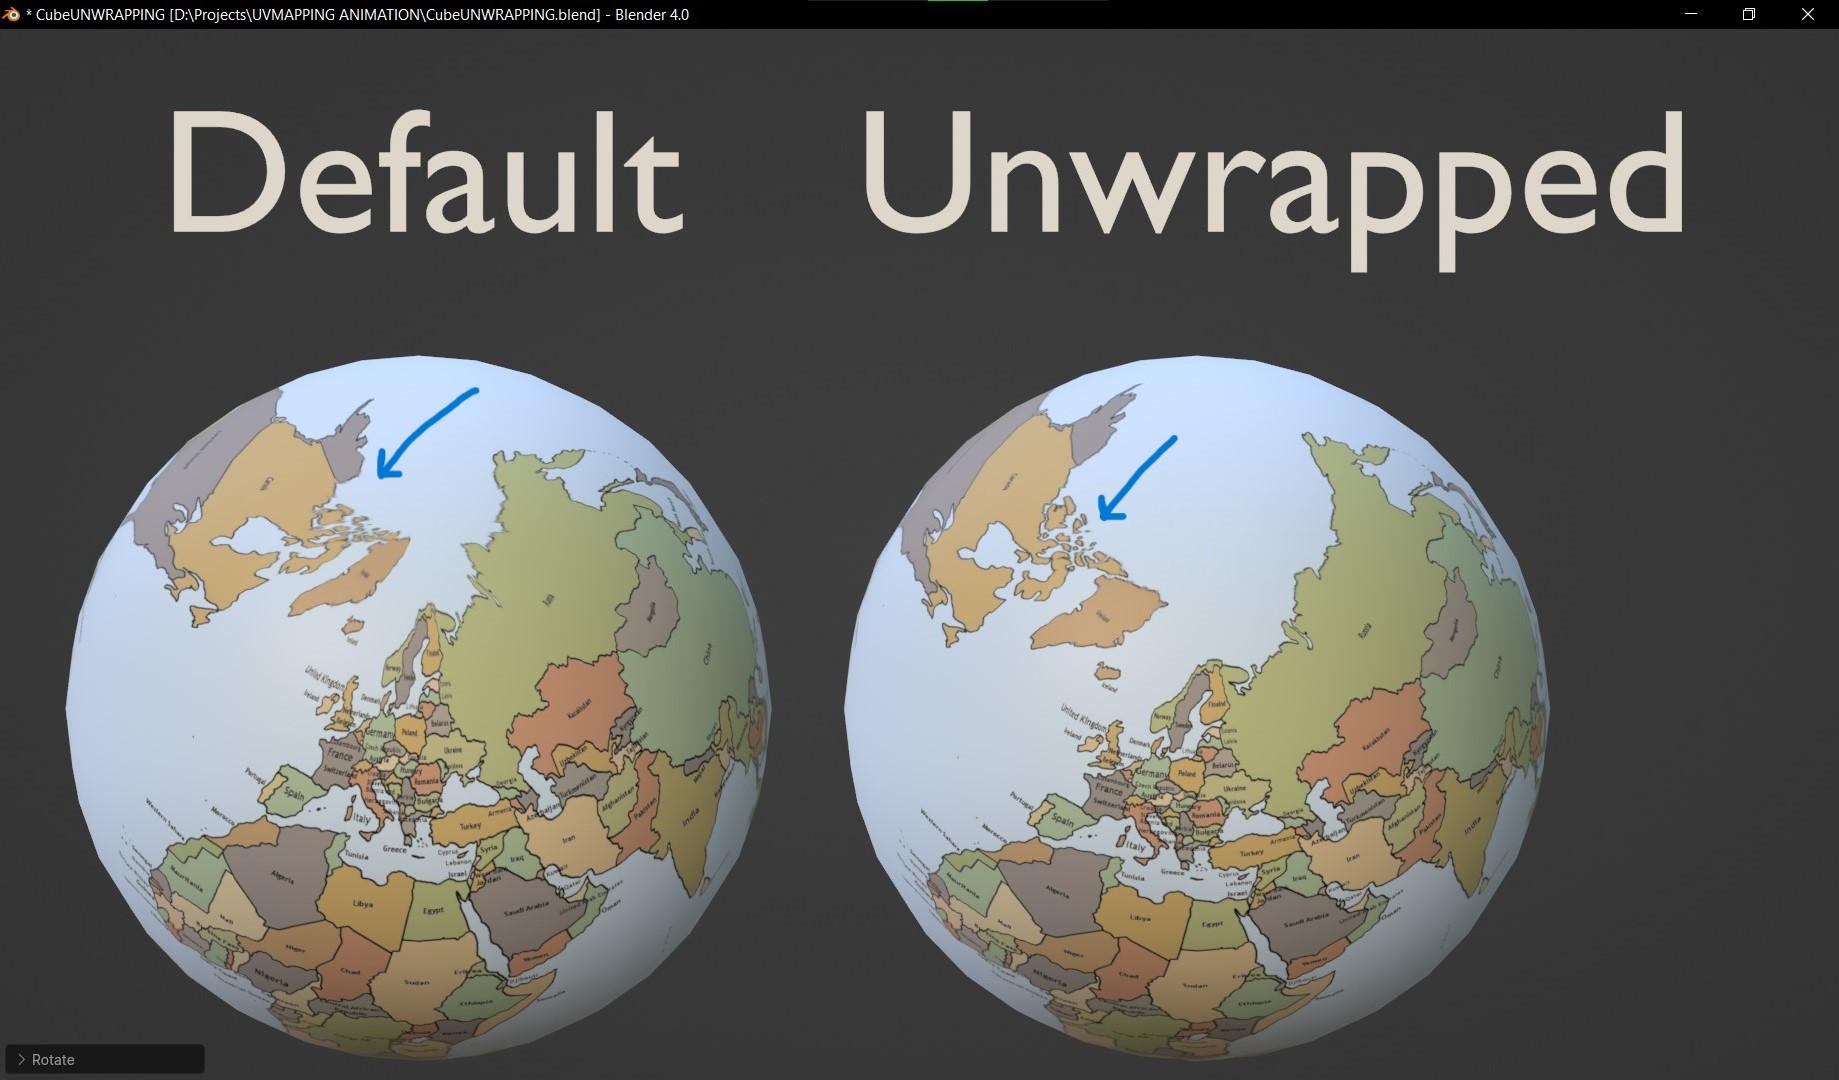
Want to make earth planet? Let’s unwrap the sphere:
Shift+A >> meshes >> sphere
the default method for blender is simply U>>sphere projection, and from the bottom left corner from the adjust-last-operation menu change the direction to align with object and the pole to fan , but it mostly don’t work for other spherical objects other than the default sphere, so for more generalized method:
- We will unwrap It like the cylinder: mark seam the top and bottom circles
- Create a vertical seam on the back
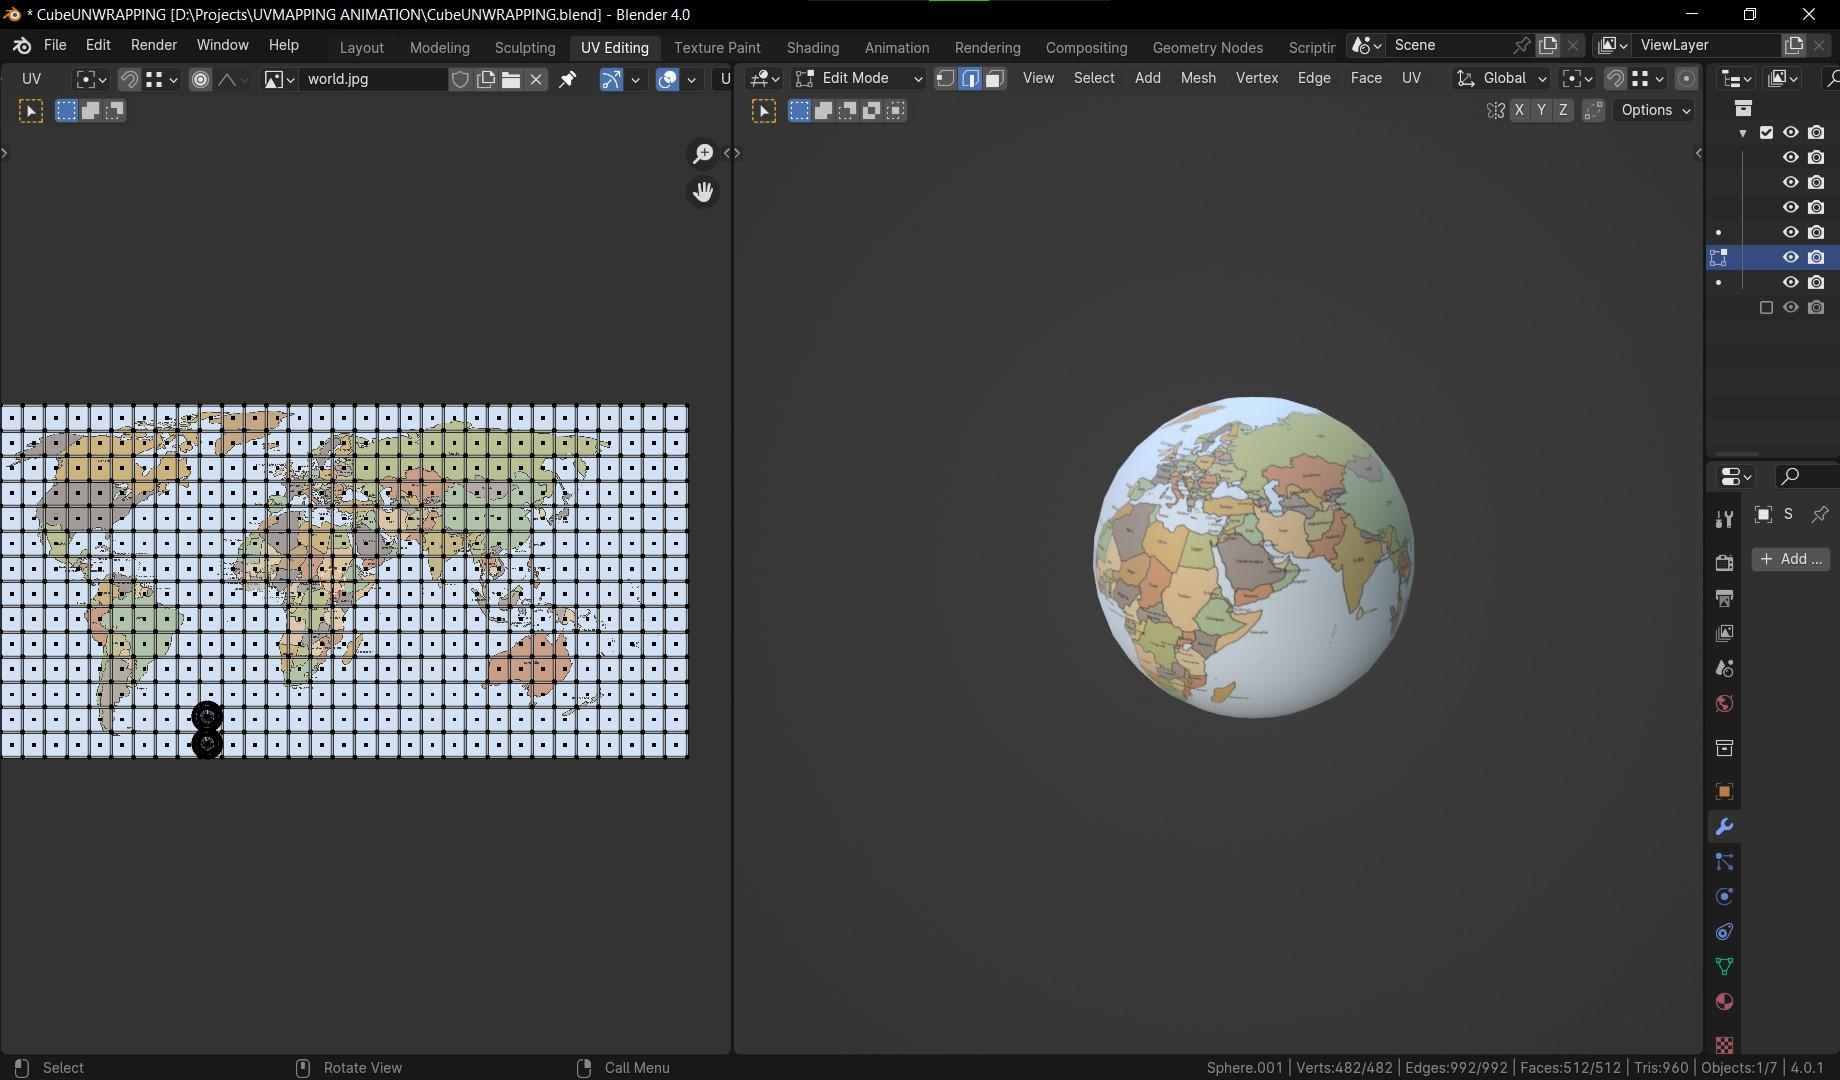
- It’s done but we can do a further step so the map is squared for better result when adding the texture or the world map in this case,
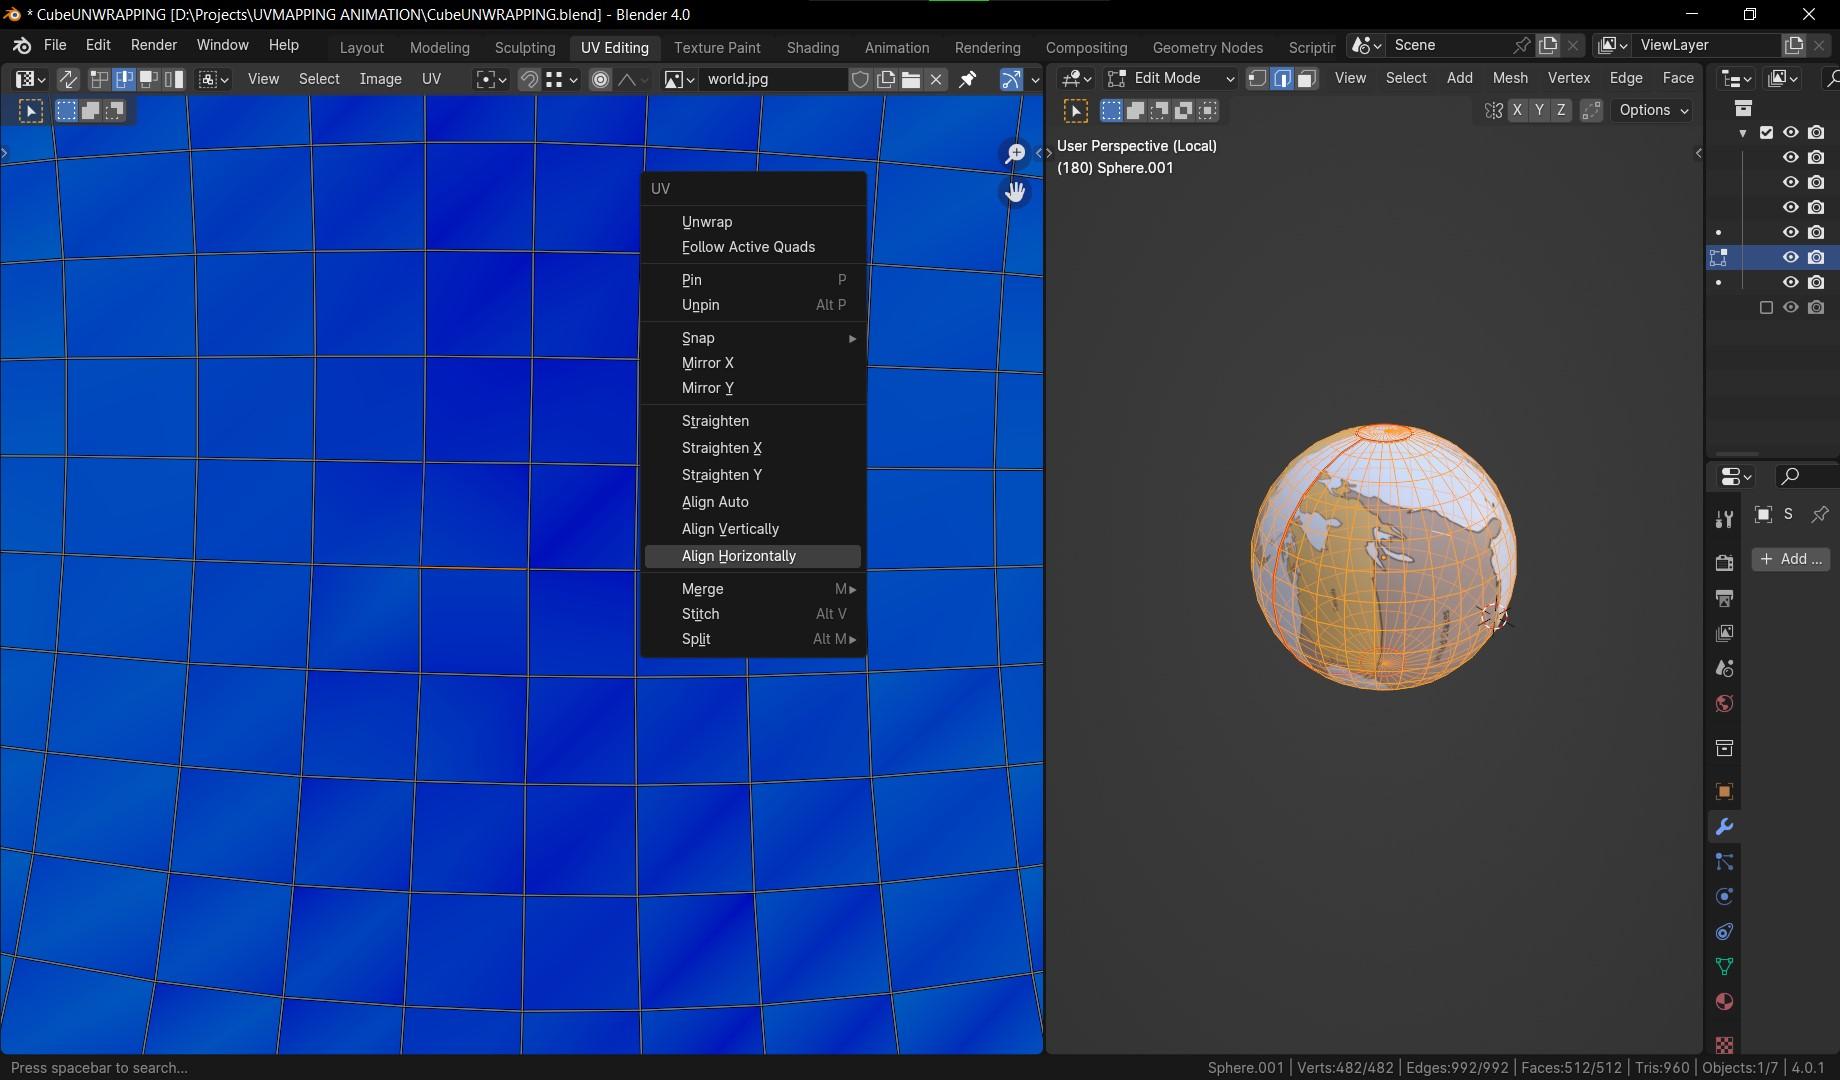
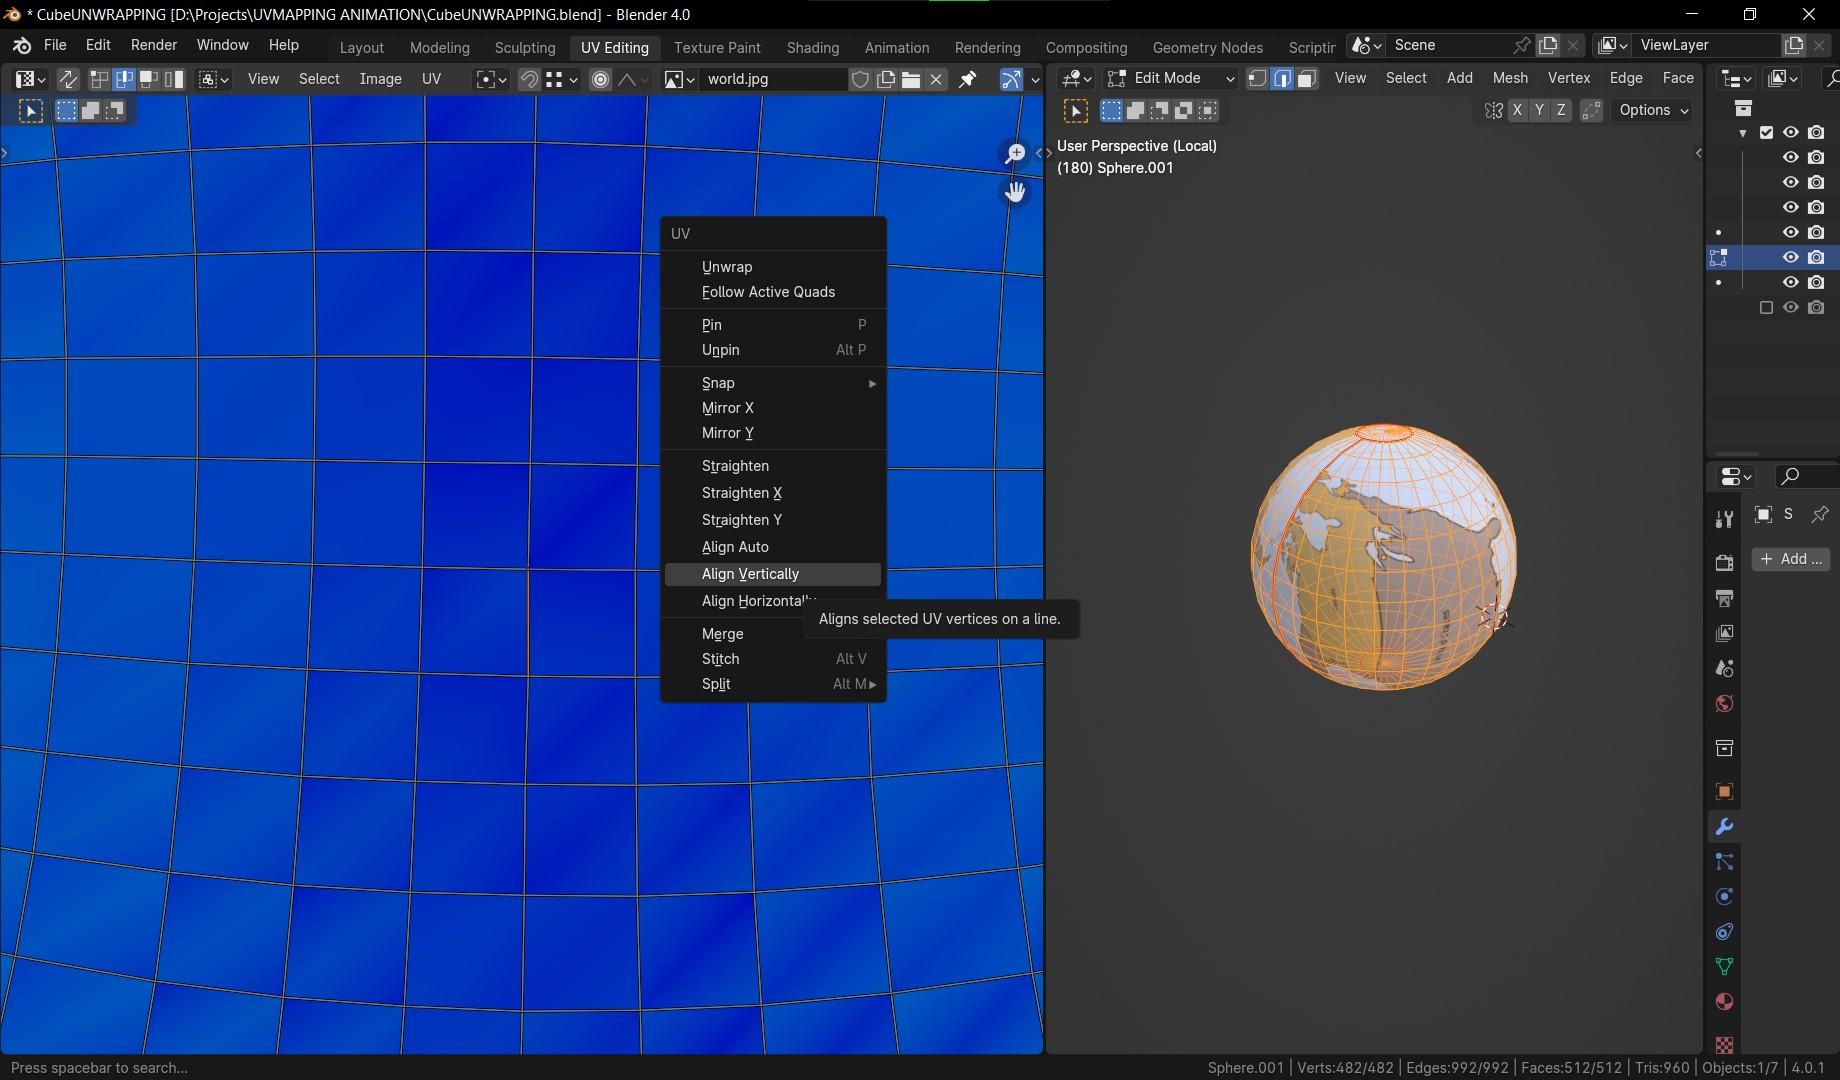
select a square in the middle of the UV island (connected geometry in UV called island) - press 2 for edge select, select the left edge>>right click>>align vertical
- select the right edge and press Shift+R for “repeat last action”
- select the top edge >>align horizontal
- select the bottom edge then Shift + R
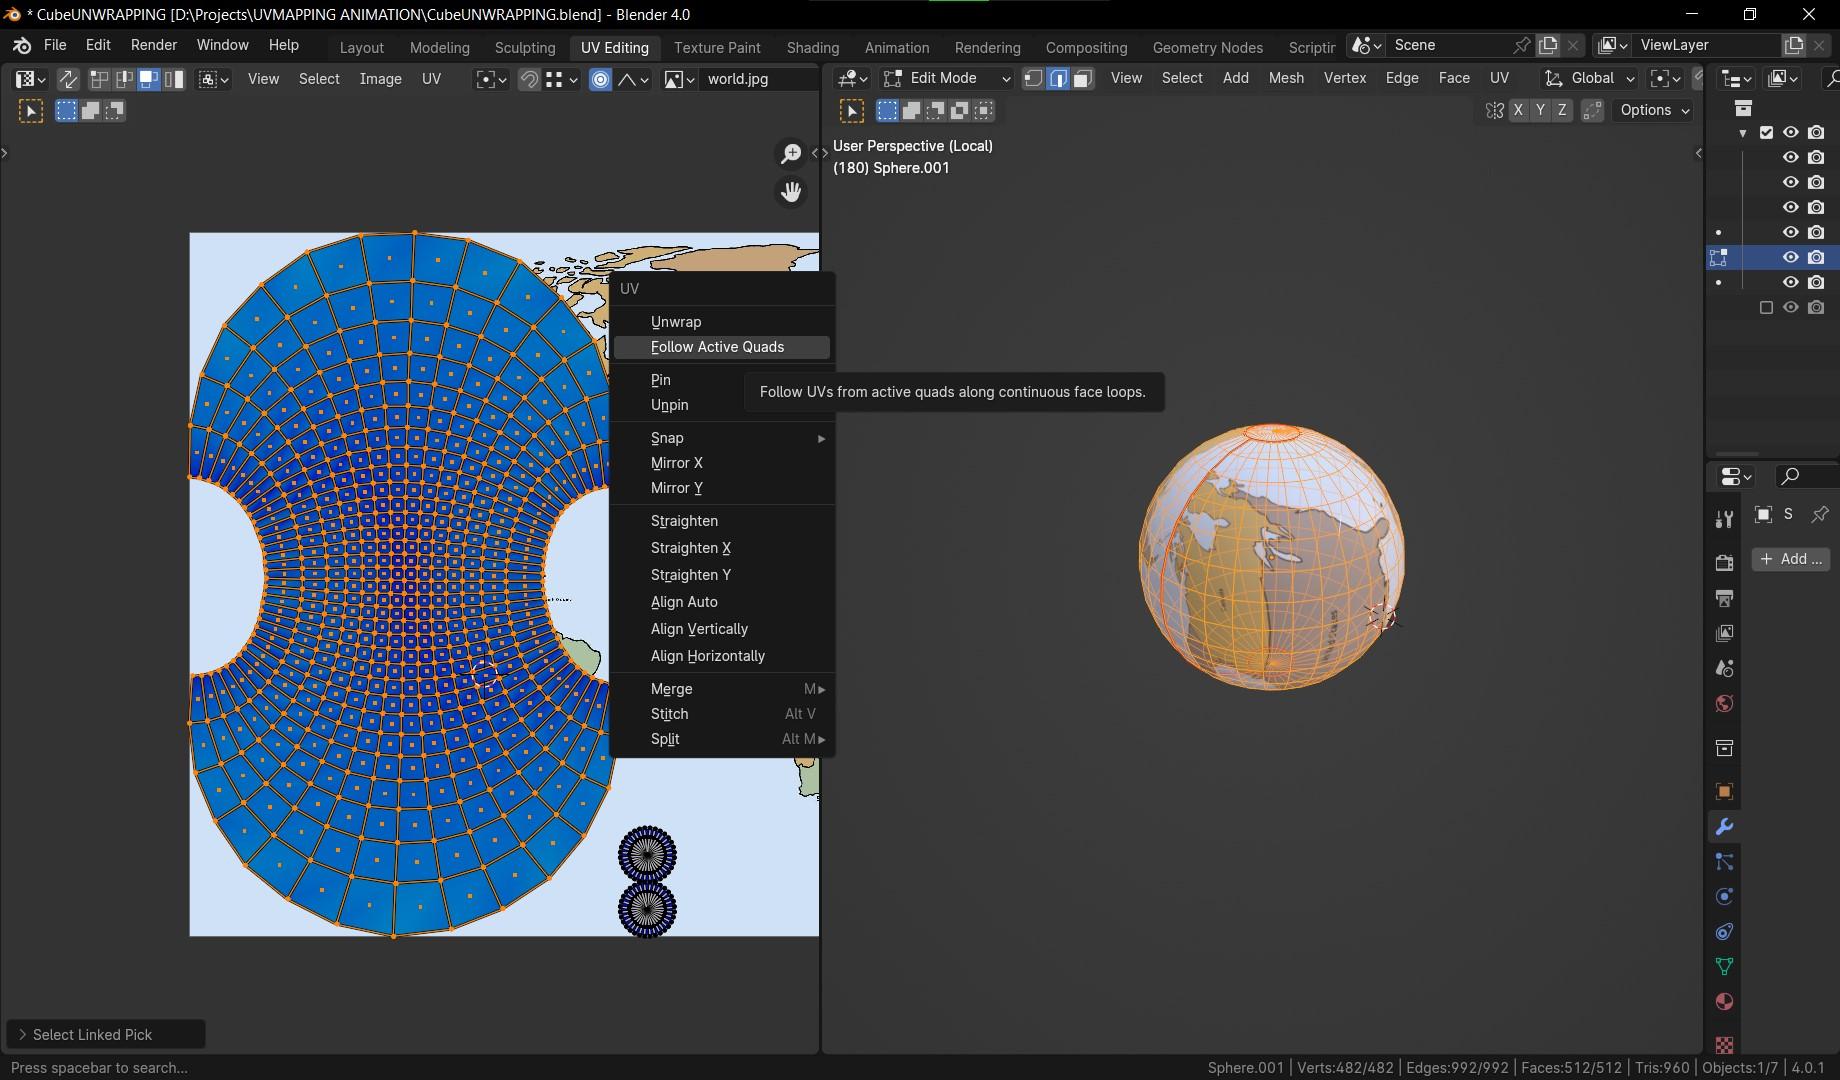
- press 3 for face select, select the square so it’s the active selection
- press 4 for island selection and select the island
- right click>> follow active quad
- rotate and scale the island to fit the texture space
UV packing
After unwrapping the model, the second phase is packing,
which is scaling and placing the islands together.
We focus mostly on two things, exploit the largest possible space and giving every island/ asset the proper texel density
Texel density “is a measurement unit used to make asset textures cohesive compared to each other throughout your entire world.
It’s measured in pixels per centimeter (2.56px/cm) or pixels per meter (256px/m). “
Meanwhile it refers to the number of texture elements per unit of area on a 3D model. This is crucial in determining the quality and detail of textures applied to the model.
The importance of texel density lies in achieving optimal visual fidelity and avoiding texture distortion or blurriness when rendering the model.
To make effective use of texel density, it is essential to maintain consistency across different parts of the model to ensure uniform texture resolution. One can achieve this by using UV mapping techniques to control how textures are applied to the model’s surface. Additionally, adjusting the texel density based on the distance of the camera from the model can help optimize performance without compromising visual quality. By understanding and implementing texel density effectively, 3D artists and game developers can enhance the realism and visual appeal of their creations, providing a more immersive experience for viewers and users alike.
Likely there is a great addon for blender that help you achieve good results: https://mrven.gumroad.com/l/CEIOR
after setting up the proper texel density, we’ve got to pack them,
simply put them together in the UV map without overlapping and you might adjust the rotations and re-scale some islands to make use of the empty spaces in the UV map you could do it manually and automatically using addons like the free addon: https://www.uv-packer.com/
Sources: